Tampilkan postingan dengan label vintage. Tampilkan semua postingan
Rabu, 27 Juli 2011
The Sartorialist Files: The Blanket Lined Trucker Jean Jacket
Man I never thought I would see the return of the jean jacket; even more startling I am now openly on a quest to outfit my closet with a very fresh and stylish jean jacket. Man when items that were once a fad in the yesteryear make a triumphant return you cannot help but take notice and maybe take a ride on the bandwagon. The jean jacket has been seen on the likes of Kanye West and Chris Brown to name a few; both artists have given a fresh vibe to the staple jean jacket.
Anyway the folks over at Levi's have presented a stunning jean jacket according to Selectism "Levi’s worked on this Blanket Lined Trucker as part of their Levi’s Union Square Tailor Shop initiative in San Francisco. “The Tailor Shop has deconstructed Vintage Levis Big E Denim Jackets from the 1960’s and by using 100% cotton thread re-purposes cotton camping blankets from the 1940’s as an inside lining. Each unique handpicked vintage camping blankets allows for these jackets to be exceptionally personal.”
Via: Selectism
LV
Rabu, 20 Juli 2011
New Zanerian Vintage Alphabet instructor from 1900
Amesome lettering find the other day, more to come, vintage type books about lettering, The New Zanerian Alphabets from 1900 on PDF


Label:
alphabets,
american,
art book,
designing,
engrossing,
hand lettering,
roundhand,
typography,
vintage,
zanerian
Underwood Master 1939
It seems like just yesterday I perched on a stack of books at my grandfather's roll-top desk, typing with one finger at his Underwood typewriter. I adored the mechanical tap-tap, the scent of ink, and the beauty of the mellow font; in fact, I still do.
When I spotted this Underwood Master, 1939, across a crowded room at the Heart of Ohio Antique Center, a few months ago, I flew to his side and made him my own. Okay, he needs a little work; the keys are stiff and he needs a new ribbon. Still, a bargain at $30.
The Underwood Master became truly famous after a publicity stunt at the 1939 World's Fair in New York. A gigantic 14 ton working model was constructed, earning the title "The World's Largest Typewriter". It took paper 9 x 12 feet and the ribbon was 5 inches wide and 100 feet long. Thank god, my Underwood isn't quite so large.
It does, however, evoke pleasant memories, as well as being personally symbolic. Not in my wildest of dreams, would I have imagined my self turning to writing at this stage of my life. Maybe my attraction to Grandpa's Underwood was a foreshadowing of my future? Yes, I think it was. Who knew?
There is nothing to writing.
All you do is sit down at a typewriter
and bleed.
Ernest Hemingway
Jumat, 10 Juni 2011
20% Off At Vintage Townsquare This Weekend
It has been so much fun running my shop on Etsy, Vintage Townsquare. I started this venture last August. I enjoy every aspect of it. The shopping, listing and shipping of every item.
I love using vintage touches throughout my home. Having a collected look is so on trend right now as evidenced by most homes you see in magazines.
Vintage Townsquare has recently reached 100 Facebook followers, to celebrate I am offering a 20% coupon code. This is especially for my Facebook followers as a way of saying, "Thank you so much"!!
Here is a sampling of some items currently listed in the shop.
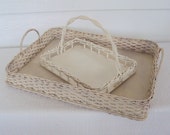
From the Travel and Recreation category:
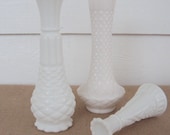
From the It's All White category:
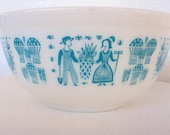
From the Farmhouse Fresh category:
And a whole lot more goodies!! This sale is the perfect time to buy something for yourself and a friend. Have fun shopping!
And the link again:
Vintage Townsquare on Facebook
Thanks for stopping by! Libby~
I love using vintage touches throughout my home. Having a collected look is so on trend right now as evidenced by most homes you see in magazines.
Vintage Townsquare has recently reached 100 Facebook followers, to celebrate I am offering a 20% coupon code. This is especially for my Facebook followers as a way of saying, "Thank you so much"!!
To learn the coupon code, Like us right now and shop all weekend long! Simply click below.
Here is a sampling of some items currently listed in the shop.
From the Travel and Recreation category:
From the It's All White category:
From the Farmhouse Fresh category:
And a whole lot more goodies!! This sale is the perfect time to buy something for yourself and a friend. Have fun shopping!
And the link again:
Vintage Townsquare on Facebook
Thanks for stopping by! Libby~
Senin, 06 Juni 2011
How We Refinished The Buffet
First, let me say how much it means to receive so many nice comments on my finished buffet. That is almost as rewarding as the finished piece!
As promised, here are the steps we took in refinishing the buffet. If you missed the first post, click here to read.
We didn't take pictures while we worked. But that is OK as this is not really intended to be a step by step tutorial. There are other bloggers with some really good ones. I highly recommend Shaunna at Perfectly Imperfect and Mariann at Miss Mustard Seed.
I painted two coats with Annie Sloan's Chalk Paint in Louis Blue. I found the paint did become thicker the longer the can was open. This led to more visible brush strokes after the second coat. One of the nice things about this paint is that you can easily add water to achieve a lighter color or thinner consistency. This also leads to an easy clean-up!
This whole process was completely an experiment as we (my husband and I worked on it together one Saturday) had never worked with chalk paint before. We used a very fine sanding block to remove brush marks. This paint sands so easily! We then distressed it in various areas. Again, a breeze.
Because we had it on hand, we used Ralph Lauren Tinting Glaze in Cottage Hill to added some age to the buffet. We diluted this, two parts glaze and one part water. My husband wiped it on and I came behind him and wiped it off. I found that this glaze had some green undertones.
We then used Minwax, Paste Finishing Wax in Natural. Again, this was the wax we had on hand.
We put it on much like you would on a car in a circular motion. Waited about 15 minutes, then used a soft cloth to buff to a nice shine.
It was really after the wax was buffed that this piece really began to sing! The wax brings out the beauty of the chalk paint and the distressing. Up to that point, I wasn't sure. The longer we buffed, the more I smiled! The wax brought out the old-world patina I was looking for. We chose to use the existing hardware.
And for those who have difficulty with me painting an old piece of furniture, I have to say that I feel I gave this buffet it's second life. I never would have bought it in the first place without planning on painting it. Before, it looked too Victorian and granny. Now, it feels fresh and modern with a European antique style. I believe we will enjoy this buffet for years to come.
A reminder of how it looked before.
And some more "afters" of my treasure!
Thanks for visitng! Libby~
Linking to the following parties!
Debbiedoos Blogging and Blabbing Newbie Party
Between Naps on the Porch for Metamorphis Monday
As promised, here are the steps we took in refinishing the buffet. If you missed the first post, click here to read.
We didn't take pictures while we worked. But that is OK as this is not really intended to be a step by step tutorial. There are other bloggers with some really good ones. I highly recommend Shaunna at Perfectly Imperfect and Mariann at Miss Mustard Seed.
I painted two coats with Annie Sloan's Chalk Paint in Louis Blue. I found the paint did become thicker the longer the can was open. This led to more visible brush strokes after the second coat. One of the nice things about this paint is that you can easily add water to achieve a lighter color or thinner consistency. This also leads to an easy clean-up!
This whole process was completely an experiment as we (my husband and I worked on it together one Saturday) had never worked with chalk paint before. We used a very fine sanding block to remove brush marks. This paint sands so easily! We then distressed it in various areas. Again, a breeze.
Because we had it on hand, we used Ralph Lauren Tinting Glaze in Cottage Hill to added some age to the buffet. We diluted this, two parts glaze and one part water. My husband wiped it on and I came behind him and wiped it off. I found that this glaze had some green undertones.
We then used Minwax, Paste Finishing Wax in Natural. Again, this was the wax we had on hand.
We put it on much like you would on a car in a circular motion. Waited about 15 minutes, then used a soft cloth to buff to a nice shine.
It was really after the wax was buffed that this piece really began to sing! The wax brings out the beauty of the chalk paint and the distressing. Up to that point, I wasn't sure. The longer we buffed, the more I smiled! The wax brought out the old-world patina I was looking for. We chose to use the existing hardware.
And for those who have difficulty with me painting an old piece of furniture, I have to say that I feel I gave this buffet it's second life. I never would have bought it in the first place without planning on painting it. Before, it looked too Victorian and granny. Now, it feels fresh and modern with a European antique style. I believe we will enjoy this buffet for years to come.
A reminder of how it looked before.
And some more "afters" of my treasure!
Thanks for visitng! Libby~
Linking to the following parties!
Debbiedoos Blogging and Blabbing Newbie Party
Between Naps on the Porch for Metamorphis Monday
Label:
Annie Sloan,
chalk paint,
home decor,
linking party,
vintage
Selasa, 31 Mei 2011
My Louis Blue Chalk Paint Buffet
You may remember that a couple of months back I purchased two pieces of furniture that I was so excited about. I found them on eBay classifieds. These listings are usually just for local sales. More like Craig's List. Here is the post when I shared about my finds.
Yup, the paint can had popped opened during shipping. Good for me, kind Virginia, at Southern Institute of Faux Finishing in Mississippi, the placed I had ordered from, immediately made it right. Two days later I received another can and this one was in tip top shape.
Here is the buffet before in all of it's 1920's glory.
And the reveal!!
Last Saturday, my husband and I finished up this project and I couldn't be happier with the results. Like many others, (namely Miss Mustard Seed) I chose to leave the top as is. I just polished it with some Old English.
We removed the decorative piece that was centered on top as we felt it competed some with the mirror.
With having the piece finished I decided to change some things around for a fresh summer look. I brought my two white lamps from another room. On one side I added a silver tray with a small frame, wooden box and sea shells.
On the other side I added a pretty etched glass bottle from Portugal and continued using my silver wine cooler as a planter.
From another view
And a final view with the lamps on.
Thanks for stopping by!! I love to read your comments! Libby!
**pointed out by Annie Sloan herself - it is Louis Blue not Louie Blue - Thanks Annie! correction is made**
Linking to the following parties:
Wow Us Wednesday at Savvy Southern Style
Tabletop Tuesday at a Stroll Through Life
Home Decor and Organizing Link Party at Organize and Decorate Everything
Piece of Work Wednesday Furniture Link Party at Primitive & Proper
Furniture Feature Friday at Miss Mustard Seed
Home Decor and Organizing Link Party at Organize and Decorate Everything
Piece of Work Wednesday Furniture Link Party at Primitive & Proper
Furniture Feature Friday at Miss Mustard Seed
Label:
Annie Sloan,
chalk paint,
color,
home decor,
linking party,
tablescape,
vignette,
vintage
Minggu, 29 Mei 2011
Score!! An Old Wooden Framed Picture For a Project
For some time I have been on the lookout for a large picture and frame that I could turn into a blackboard for our great room.
I had seen this look here and here.
The frame needed to be chunky and of course wooden. The older, the better. The picture needed to have a smooth finish so that it could be spray painted with chalkboard paint and then easily write upon. And of course the price needed to be as close to zero as I could get it. :-)
Last week I was in a thrift store close to my home and spied something that I thought could work.
Wooden chunky old frame? Check
Large enough to fit the space needed? Check
Smooth finish picture? Check
No smoke or bad odors to contend with? Check
Lowest price possible? Check, check and check
This is the before:
What's that? How much did I pay for this? Thought you would never ask!
Less than $10!! That is pretty close to zero and that is my kind of deal!
It has a rather nice scenic picture in it really. A charming English cottage on the water. Sorta hated to spray paint over it. But I don't want another picture in this room and besides, the chalkboard spray paint will give it it's second life.
Some close-ups of the frame.
I was happy to see that the picture also had a nice hanging wire already installed.
So I removed the picture from the frame, took it to my back covered deck and spray painted it. It took two coats of Krylon Chalkboard paint in black. Reassembled the frame and added a patriotic message for Memorial Day. Here is the final reveal:
I did add some Rub n' Buff in Antique Gold in a few places on the frame just to brighten it a bit.
To celebrate Memorial Day, I also added a couple of flags to a plant on the front porch. We enjoy proudly displaying our beautiful Red, White and Blue!
Thanks for stopping by! Libby~
Linking up to:
Debbiedoos Blogging and Blabbing Newbie party
Between Naps On The Porch for Metamorphis Monday
Coastal Charm for Nifty Thrifty Tuesdays
Southern Hospitality for Thrifty Treasures
I had seen this look here and here.
The frame needed to be chunky and of course wooden. The older, the better. The picture needed to have a smooth finish so that it could be spray painted with chalkboard paint and then easily write upon. And of course the price needed to be as close to zero as I could get it. :-)
Last week I was in a thrift store close to my home and spied something that I thought could work.
Wooden chunky old frame? Check
Large enough to fit the space needed? Check
Smooth finish picture? Check
No smoke or bad odors to contend with? Check
Lowest price possible? Check, check and check
This is the before:
What's that? How much did I pay for this? Thought you would never ask!
Less than $10!! That is pretty close to zero and that is my kind of deal!
It has a rather nice scenic picture in it really. A charming English cottage on the water. Sorta hated to spray paint over it. But I don't want another picture in this room and besides, the chalkboard spray paint will give it it's second life.
Some close-ups of the frame.
I was happy to see that the picture also had a nice hanging wire already installed.
So I removed the picture from the frame, took it to my back covered deck and spray painted it. It took two coats of Krylon Chalkboard paint in black. Reassembled the frame and added a patriotic message for Memorial Day. Here is the final reveal:
I did add some Rub n' Buff in Antique Gold in a few places on the frame just to brighten it a bit.
To celebrate Memorial Day, I also added a couple of flags to a plant on the front porch. We enjoy proudly displaying our beautiful Red, White and Blue!
Happy Memorial Day!!
We honor those who have and are serving in all the armed forces for our nation. God Bless You!!
Thanks for stopping by! Libby~
Linking up to:
Debbiedoos Blogging and Blabbing Newbie party
Between Naps On The Porch for Metamorphis Monday
Coastal Charm for Nifty Thrifty Tuesdays
Southern Hospitality for Thrifty Treasures
Label:
chalkboard,
home decor,
spray paint,
thrifting,
vintage
Langganan:
Postingan (Atom)